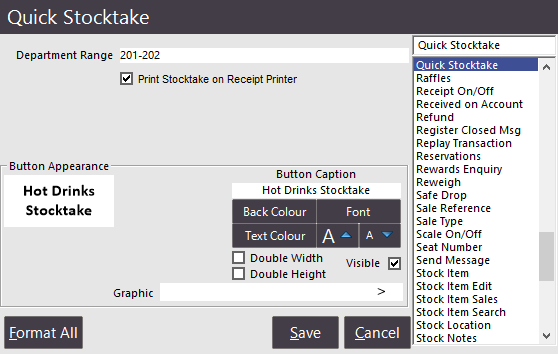
This function allows you to perform a quick stocktake from the POS screen on a small number of items. You can configure multiple buttons by using a Department Range on each button, so only select Departments are available when that particular button is selected.
Go to Setup > POS Screen > POS Screen Setup > Layouts > Buttons > Select Button > Function: Quick Stocktake.
Department Range: Enter the Departments you want this button to be responsible for.
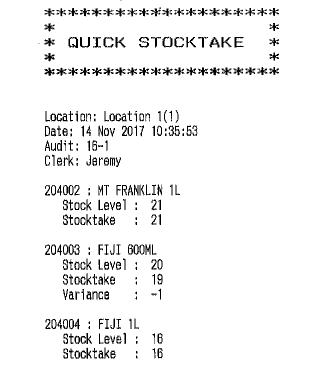
Print Stocktake on Receipt Printer: Check to print out the variance reports on the receipt printer.

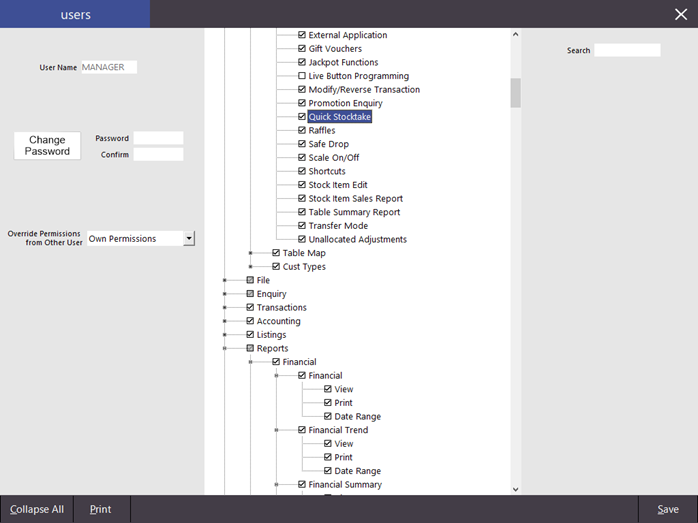
You are able to control which Users have access to this function so not all staff can access it.
Go to Setup > Users > Select User > Clerk Permissions > POS > Quick Stocktake.
From the POS Screen select the Quick Stocktake button you created.

A new window will open where you can enter the quantity of items into the stocktake field. Use the keypad to enter the quantity of items and the arrow buttons to the line above or below. You can also directly press the stock item to select it.
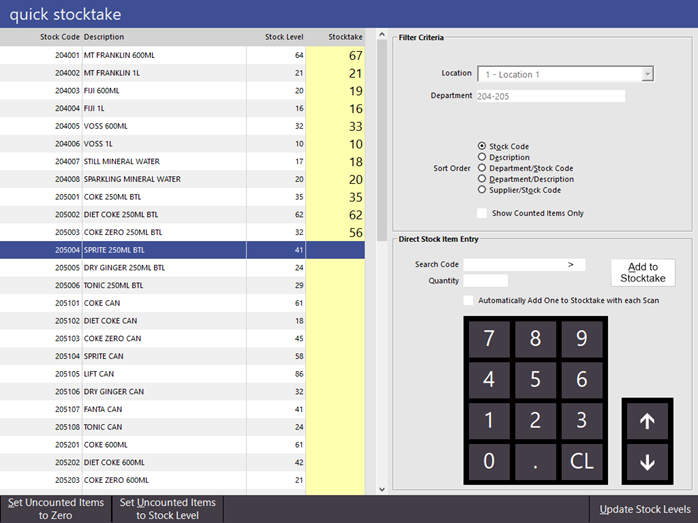
When you are ready to save the details, or need to use the POS screen, press Update Stock Levels.

A confirmation message will display on screen.

If a receipt is set to print, the details will be included on there.
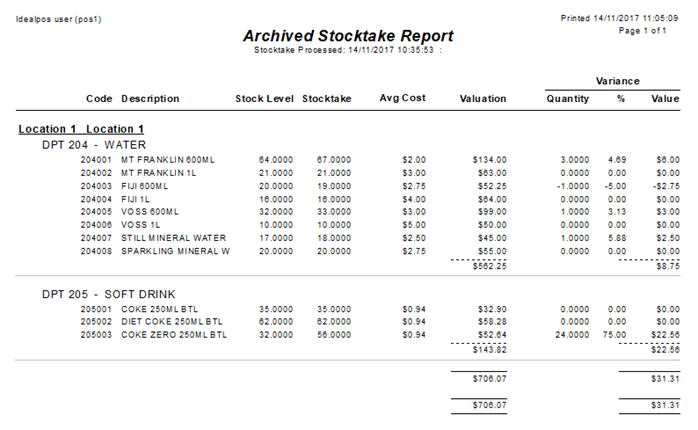
All Quick Stocktake variances will be recorded in the Archived Stocktakes Reports.
Go to Reports > Stock Control > Archived Stocktakes > Select > View.
